TL;DR

Get the little things that make your day delivered free — and shop member deals
- Fast, free delivery on millions of items
- Access to Prime Big Deal Days deals on October 6–7
- Prime Video, Amazon Music and more included
Choose one Halloween theme, repeat two or three motifs, and layer lighting, hanging details, and floor-level props to make your party feel immersive. Anchor the look at the entrance or a photo backdrop, reuse what you can, and keep exits and walking paths clear.
A hallway with one amber bulb, a paper raven overhead, and dry leaves whispering underfoot can feel spookier than a room crowded with plastic monsters. Atmosphere comes from the way decorations work together, not from how many bags you buy.
This guide will help you choose a theme, light your space, make a few budget-friendly details, and keep the party comfortable for guests. Whether you are dressing up a studio apartment or a whole house, you can create a spooky Halloween party that feels considered and easy to move through.
Choose one theme and repeat two or three motifs to make the decorations feel connected.
Layer a few lights with details overhead, at eye level, and near the floor.
Use the entrance as a first scene and a focal point as the room’s visual anchor.
Mix homemade pieces with one time-saving store-bought prop, then save durable decorations for next year.
Keep exits visible, cords out of walkways, and flame-free candles near paper or fabric.
Choose a theme that makes every decoration belong
A Halloween theme gives your decorations one clear visual direction, so guests see a scene instead of a jumble of props. Pick a setting such as a haunted house, gothic manor, eerie forest, or playful monster party, then repeat two or three motifs across the room. Repetition helps the brain connect separate details into one imagined place; a haunted forest can use bare branches, ravens, and muted green light from the doorway to the snack table. The same motifs can also guide what you skip, saving money and preventing visual clutter.
Start with a small palette: classic black and orange, black and purple, bone white with blood red, or mossy greens with brown. If your living room already has bright furniture, choose a theme that works with it rather than trying to cover everything. Covering every surface takes time and can make a small room feel cramped. Consistency beats quantity; three ravens repeated on a mantel, wall, and table look more intentional than a dozen unrelated decorations because guests can recognize the pattern from different parts of the room.
Think about who is coming, too. Friendly ghosts, smiling pumpkins, and soft lights suit a family gathering, while a grown-up gothic dinner can lean on dark fabric, candle-shaped LEDs, and old-looking frames. The same room can shift mood with color and sound, like a stage changing scenes between a matinee and a midnight show. Choosing the mood early matters because it affects practical decisions too: a playful party may need brighter light for games, while a darker dinner scene calls for enough task lighting to see food and steps.
Use light and height to make a plain room feel haunted
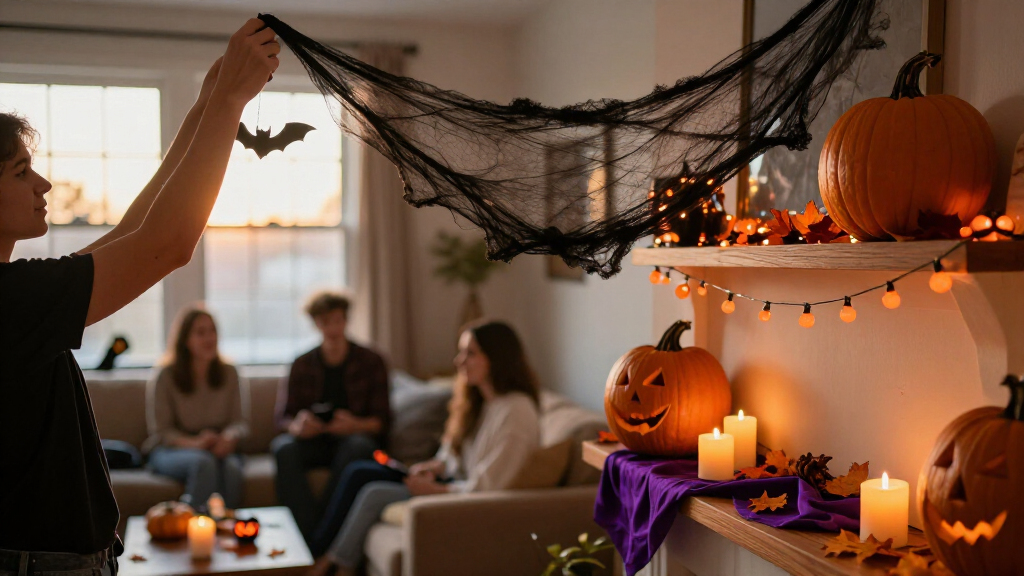
Layered lighting and decorations at several heights can make an ordinary room feel spooky without filling every corner with props. Dim a lamp, add a strand of warm string lights, hang paper bats overhead, and place a few small details at eye level and near the floor. Varying height gives the eye a path through the room, so even a few objects can suggest a larger scene. In a narrow entry, a battery-powered lantern beside a cardboard gravestone can make the walk to the party feel like part of the event, though the prop should sit against the wall so the effect does not come at the cost of a clear route.
Use light to draw the eye toward one focal point, such as a mantel, dining table, decorated doorway, or photo backdrop. A violet bulb aimed at a bare wall creates an eerie patch of color, while a low amber light makes paper leaves glow like embers. These different color temperatures also help separate parts of a room: a colored wash can create atmosphere, while a steadier lamp near food keeps labels and plates visible. Battery-powered candles are a sensible choice near gauze, paper, or dried foliage; they trade the flicker and warmth of real flames for a safer setup that needs less monitoring.
For a stronger scene, mix textures: drape cheesecloth over a doorway, tape paper silhouettes to a window, and add a few branches in a jar. Texture matters because light falls differently on rough, sheer, and flat surfaces, creating depth without adding many objects. If you use a projector, check the wall in advance; a bright, cluttered room can wash out the image, and moving people may interrupt it. One focused beam and a few repeated shapes often do more than a pile of props because they give the eye a clear focal point instead of competing signals.
Build a memorable entrance with three simple steps
- Set the palette at the door. Add a dark fabric strip, paper leaves, or a small sign that signals your theme. A black-and-purple party could start with a violet bulb and a raven silhouette. This first cue helps guests understand the scene before they enter, so later decorations feel like part of a story rather than a surprise collection.
- Add one overhead detail. Suspend lightweight bats, paper ghosts, or a lantern where people can see it without ducking. Secure it firmly and keep it away from fans and stair rails. An overhead element makes the entry feel enclosed, but it should not obscure faces, snag clothing, or make people hesitate as they pass through.
- Use a low, sturdy prop to complete the scene. Try a pumpkin, faux gravestone, or basket of costume accessories beside the wall, leaving the center of the route open. A low object gives the scene a visual base and can serve a purpose, but fragile or wobbly props are poor choices near a busy doorway where bags and coats may brush against them.
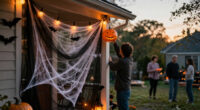
A decorated entrance creates anticipation before guests reach the main gathering space. Imagine your friends arriving after sunset: they spot the raven at the door, hear a quiet wind sound from inside, and know the party has a story. That transition can make a modest room feel more immersive because guests experience the theme in stages. Keep the effect gentle enough that nobody has to guess where the door or stairs are; a dramatic entrance loses its charm if it slows arrivals or creates a trip hazard.
This is also a handy place for a practical touch. A sign can point guests toward coats or the bathroom while fitting the theme, and a small table can hold party favors. Giving a decoration a useful job reduces the number of separate objects you need and makes directions easier to spot. Decoration can guide guests through the space as well as set its mood, which is especially helpful when guests are unfamiliar with the layout.
Stretch your budget with homemade, reusable details
DIY Halloween decorations can give you a tailored look using cardboard, jars, scrap fabric, and thrifted finds. They work especially well when you match each item to your chosen palette instead of making every idea you see online. This approach turns inexpensive materials into a coordinated set, but it does ask for time and a little planning. A row of clean jars wrapped in gauze and labeled “moon dust” can hold wrapped sweets or napkins on a snack table, making the decoration useful while keeping the tabletop from filling with props.
Reuse cardboard to cut bats or crooked tombstones, then color them with leftover paint. Tie fabric scraps into a banner, or drape an old sheet over a lamp only if the fabric stays well away from the bulb. The lower cost comes with tradeoffs: handmade pieces may take longer to cut and finish, and thin paper can bend or tear during storage. Store durable pieces in a labeled box after the party so you can bring back the same look next year and add one new detail. Reuse pays off most when items are sturdy enough to survive packing and still fit the next year’s theme.
Store-bought props can save time, especially when you need a large focal piece or have only an evening to decorate. A useful balance: buy one standout item, such as a skeleton hand for the table, then build the rest from materials you already own. The purchased piece gives you a ready-made anchor, while homemade details help it feel personal; the main risk is choosing an item that clashes with your palette or is too large for the room. Reusable pieces cost effort up front but can serve several seasons; delicate paper details are cheap and easy to replace. Match the spending choice to your constraint: buy when time is scarce, make when customization matters, and reuse when storage space allows.
Compare quick decoration choices before you shop
The best decoration choice depends on your room, time, budget, and guests. Use this quick comparison to decide where to spend effort: lights create atmosphere fast, DIY pieces personalize a scene, and store-bought props save crafting time. For a small apartment, a tabletop focal point and colored bulb may be enough. The useful question is not simply which option looks best, but what each option solves: lighting changes the whole room quickly, handmade details make a theme specific, and a bought prop fills a visual gap without a craft session.
| Choice | Works well for | Example | Tradeoff |
|---|---|---|---|
| Layered lighting | Fast mood in any room | LED candles and one colored bulb | Needs safe cord placement and a test before guests arrive |
| DIY decorations | Low-cost, custom scenes | Cardboard bats or labeled jars | Requires time to cut, paint, and set up |
| Store-bought focal prop | Quick visual anchor | A skeleton or large pumpkin | Can take storage space and may not match your palette |
| Reusable fabric and durable props | Annual parties | A cloth banner or sturdy lantern | Costs more at first and needs storage |
Choose one main investment and keep the rest simple. If you already own a string of lights, put your budget toward fabric or a backdrop; if time is tight, a ready-made centerpiece can do the heavy lifting. Consider the whole life of an item, too: a cheap oversized prop may be poor value if you have nowhere to store it, while a durable banner can earn its higher initial cost if it returns each year. A quick test in the actual room can reveal whether the choice solves the problem you have, such as a dark corner or a bare focal wall.
Keep the spooky mood safe and comfortable
A safe party keeps doors, stairs, and walking routes easy to see and use. Secure anything overhead, tuck cords along walls, and keep decorations out of the route between the kitchen and seating area. When a child darts toward a bowl of sweets or a guest carries drinks, clear paths matter more than one extra floor prop. This is a design tradeoff: decorations at floor level can add depth, but placing them beside walls preserves the effect without forcing guests to navigate around them.
Use flame-free candles near fabric and paper, and avoid placing small parts where children or pets can reach them. Fog machines and strobe effects can bother some guests, so mention them in advance and use them sparingly. A low, steady glow can create a spooky scene without flashing lights or thick fog. The gentler option is also easier to live with over several hours: guests can talk, eat, and move without adjusting to sudden changes in visibility or noise.
Check your setup from a guest’s point of view: can they spot the bathroom, find a seat, and reach the exit without moving a decoration? If you hang cobwebs, keep them away from heaters and open flames. A quick walk through before guests arrive can expose problems that are hard to see while decorating, such as a cord crossing a route or a dark step. A party feels immersive when guests can relax inside it, not when they have to watch every step. Clear routes preserve the atmosphere because guests can focus on the scene instead of the obstacles.
Make each party area part of the story
Give each area one job and one matching decorative touch, so the room feels connected without becoming crowded. A hallway can set the scene, a dining table can carry the theme through food labels and cloth, and a photo corner can give guests a place to play. Assigning a purpose to each area helps prevent the same visual treatment from competing everywhere, and it tells guests where to go. At a small apartment party, the end of a sofa can become the photo spot with a dark sheet, paper moon, and clip-on lights.
On the snack table, use themed labels for ordinary treats: “witch fingers” beside breadsticks or “monster eyes” beside grapes. Choose props that serve a purpose, such as a sturdy jar for wrapped sweets or a backdrop that doubles as a photo area. Functional decorations save surface space and make the theme feel present during activities guests already do. This helps a halloween decorations set feel useful as well as atmospheric, though food labels should remain easy to read so the joke does not make serving confusing.
Sound can round out the scene, but keep it low enough for conversation. A soft creak or rustle near the entrance may add a surprise; a loud loop running beside the table can wear guests out. Sound works best when it supports the room’s visual cues and stays in the background, since repeated effects that are exciting at first can become tiring over a long party. Setups usually combine a few visual motifs with light, sound, and texture, then leave room for people to talk, eat, and move around. The space feels more complete when each sensory detail reinforces the same story without demanding constant attention.
Frequently Asked Questions
How can I decorate for Halloween on a small budget?
Start with a theme, then use cardboard, jars, scrap fabric, and decorations you already own. Add one colored bulb or a strand of lights, and repeat a few homemade shapes around the room. A single focal point can make inexpensive pieces feel intentional.
What decorations create the spookiest atmosphere?
Layered lighting, repeated motifs, and a few contrasting textures create a strong spooky mood. Try dim amber or purple light with bare branches, paper silhouettes, or gauze. Keep one area brighter so guests can move around comfortably.
How do I make a room look haunted without many props?
Dim the main light, aim a colored bulb at a wall, and hang a few matching silhouettes at different heights. Add one focal detail, such as a raven-covered mantel or a cloth-draped table. Repeating a small set of shapes makes the room feel designed.
Which Halloween lights are safest around decorations?
Battery-powered LED candles work well near paper, gauze, and dried foliage because they do not use an open flame. Secure light cords along walls and keep them out of walkways. Test the setup before guests arrive so you can spot glare or dark steps.
How can I make a Halloween party comfortable for children and pets?
Keep small parts, sharp props, and reachable cords away from children and pets. Leave exits and walking routes open, and choose gentle lighting over startling effects. Tell guests if you plan to use fog or strobe effects, since some people find them uncomfortable.
Conclusion
Choose a theme, repeat a few motifs, and use light to lead guests from the doorway to one memorable focal point. Leave the paths clear and the mood easy to enjoy; a paper raven in a violet glow can haunt a room long after the plastic props are forgotten.