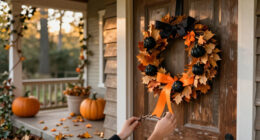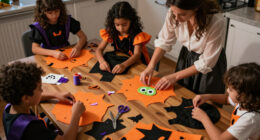

This guide walks you through decorating a home, party room, or porch for a spooky Halloween party from start to finish. You will plan a theme, build the atmosphere with lighting and sound, hang and place decorations in the right order, add two or three high-impact DIY props, and finish with safety checks so guests can enjoy the space without hazards. The guide is written for beginners — no craft expertise or special tools are required, and every project uses supplies from a dollar store, craft store, or items you already own. Expect to spend two to four hours on setup, plus an extra hour or two if you build the DIY props. By the end, your space will look deliberately haunted rather than randomly decorated, and you will know exactly how to verify the effect before guests arrive.

Get the little things that make your day delivered free with Prime
- Fast, free delivery on millions of items
- Prime Video, Amazon Music and more included
- Member-only deals all year

Sunlisky Halloween Creepy Cloth – 315" x 85" Giant Black Gauze Fabric
- ✔ Brand: Sunlisky
- ✔ Material: Black cotton gauze
- ✔ Dimensions: 315" L x 85" W

200" x 85" Bloody Halloween Creepy Cloth, Extra Wide Gauze Fabric Decoration
- ✔ Brand: FIKDCMJ
- ✔ Size: 200" L x 85" W
- ✔ Material: Polyester-cotton blend

Halloween Party Decorations Set – Spooky Banner, Hanging Paper Fans & Dot Garland
- ✔ Brand: Gatherfun
- ✔ Material: Paper
- ✔ Included Components: 1 Happy Halloween banner, 11 paper fans (2 large 16in, 4 medium 12in, 5 small 8in), 1 circle dots garland, 6 cutout cards
Difficulty: Beginner | Time: 2-4 hours (plus optional 1-2 hours for DIY props)
What You’ll Need
Tools & Materials:
- Scissors and a utility knife
- Hot glue gun and glue sticks (or clear tape and string)
- Black trash bags and rubber bands
- Staple gun or painter’s tape for hanging
- Extension cords and power strips
- Flashlight or phone light for testing lighting effects
- Cheesecloth or white sheets (2-3 yards) for ghost props
- Battery-operated tea lights or string lights (orange and purple)
- Fake cobwebs with plastic spiders
- Construction paper or cardstock (black, orange, white)
- Water-based washable paint or chalk for windows
Knowledge:
- Basic ability to hang items safely (hooks, tape, ladder use)
- Comfort with a hot glue gun or an adult to supervise one
- Familiarity with your venue’s outlets, ceiling anchors, and wall restrictions
Buy or gather all materials before you start decorating. Stopping halfway to hunt for tape or extension cords is the most common reason setup runs long. If you are decorating a rented space, confirm which adhesives are allowed — painter’s tape and removable hooks avoid wall damage. Check that every light you plan to use is rated for its location: indoor-only string lights must never go outside, even under a covered porch.
Sunlisky Halloween Creepy Cloth – 315" x 85" Giant Black Gauze Fabric
The Sunlisky Creepy Cloth earns our top spot because it solves the biggest decorating problem in one purchase: covering large areas affordably. At 315 inches long and 85 inches wide, this single piece of black cotton gauze can drape an entire doorway, cloak a long banquet table, or be cut into strips for windows and railings — and still have fabric left over. Compared with the bloody red cloth below, you get roughly 57% more coverage, which matters if you’re dressing a whole room rather than a single focal point.The real strength here is creative flexibility. Because the gauze cuts, tears, and shreds easily, you can stretch it into spider webs, hang it as tattered curtains, or layer it over furniture for an abandoned-house look. The tradeoff is that the thin cotton can tear more than you intended while shaping it — cut conservatively, because there’s no undo button on ripped gauze. Unlike the Gatherfun paper kit, this option demands some hands-on effort, but the payoff is a genuinely haunted atmosphere that paper banners simply can’t achieve.
Pros:
- Largest coverage in our lineup at 315" x 85", enough to dress an entire room
- Versatile multi-use fabric for drapes, tablecloths, window veils, and DIY spider webs
- Easy to cut, rip, and shape for fully customized spooky scenes
- Reusable cotton gauze that holds up across multiple Halloween seasons
Cons:
- Thin material may tear more than intended while shaping
- Requires hands-on cutting and arranging to look its best
- Limited to seasonal Halloween use
Best for: Hosts decorating a large space who want maximum haunted-house atmosphere per dollar
Not ideal for: Anyone wanting a ready-to-hang, zero-effort decoration out of the box
Bottom line: If you’re building one big haunted scene this year, this giant black gauze is the strongest foundation you can buy.
“If you’re building one big haunted scene this year, this giant black gauze is the strongest foundation you can buy.”
200" x 85" Bloody Halloween Creepy Cloth, Extra Wide Gauze Fabric Decoration
Where the Sunlisky cloth goes for classic haunted-house gloom, the Bloody Creepy Cloth goes straight for horror-movie shock value. The blood-red coloring reads instantly as gore, making it the stronger choice for zombie, slasher, or crime-scene themes where black gauze would look merely moody rather than menacing. Its polyester-cotton blend is also softer and stretchier than pure cotton, so it drapes more gracefully over doorframes and porch railings with less fraying at the edges.The obvious tradeoff is coverage: at 200 inches long, you get significantly less fabric than the Sunlisky, so plan on it anchoring one or two focal points rather than blanketing a whole room. That said, it holds up outdoors in weather and pairs beautifully with spiders, bats, skulls, or LED lights woven through the weave — something we’d recommend for either cloth. Note that this is a newer product with limited buyer feedback, so you’re buying on the strength of the design rather than a proven track record.
Pros:
- Blood-red gore effect that black gauze can’t replicate
- Soft, stretchy fabric drapes easily and resists fraying
- Durable and reusable, suitable for outdoor weather
- Customizable with spiders, bats, skulls, and LED lights
Cons:
- Smaller coverage area than the Sunlisky (200" vs 315")
- Very limited buyer feedback available as a newer product
- Gory look may be too intense for kid-friendly parties
Best for: Horror fans who want gore-forward decor for porches, doorways, and party focal points
Not ideal for: Buyers who need maximum fabric coverage or prefer a classic, non-gory aesthetic
Bottom line: This is the pick when spooky needs to tilt scary — expect gasps, not just compliments.
“This is the pick when spooky needs to tilt scary — expect gasps, not just compliments.”
Halloween Party Decorations Set – Spooky Banner, Hanging Paper Fans & Dot Garland
The Gatherfun decoration set takes the opposite approach from our gauze picks: instead of raw material you shape yourself, you get a complete, coordinated party look in one box — a "Happy Halloween" banner, eleven paper fans in three sizes, a circle dot garland, and six cutout cards. For a host throwing a kids’ party or a classroom celebration, this solves the styling problem in minutes, where the Sunlisky cloth would require an hour of cutting and draping to achieve a fraction of the festive polish.The tradeoff is tonal: this kit is festive rather than frightening. Vibrant colors and cheerful paper fans create a party atmosphere, not a haunted one — if your goal is genuine spookiness, the gauze options win hands down. Durability is also a consideration: paper fans and garlands bend and tear easily in storage, so you’ll want to flatten and box them carefully to reuse them next year. Compared with the weatherproof bloody cloth, this set is strictly an indoor decoration.
Pros:
- All-in-one kit with banner, fans, garland, and cutout cards included
- Assembles in minutes, saving significant setup time
- Durable enough to reuse across multiple parties with careful storage
- Vibrant, all-ages design that works for kids and adults alike
Cons:
- Paper construction is vulnerable to damage if not stored carefully
- Festive rather than scary — limited haunted-house appeal
- Indoor use only, unlike the weather-resistant gauze options
Best for: Busy hosts and family parties needing quick, colorful, coordinated decor
Not ideal for: Anyone aiming for a genuinely haunted or horror-themed atmosphere
Bottom line: The fastest route to a polished Halloween party backdrop — just don’t expect anyone to be scared.
“The fastest route to a polished Halloween party backdrop — just don’t expect anyone to be scared.”
As an Amazon Associate we earn from qualifying purchases.
Before You Start
Pick a focal point before you touch a single decoration. The most common decorating failure is spreading items evenly around a room, which reads as clutter rather than spookiness. Choose one or two areas guests will see first — the entryway, the food table, or the front porch — and concentrate your best effects there. Decide on a limited color palette now: black, orange, purple, and white are the classic spooky base, and sticking to them makes even cheap decorations look coordinated. Also confirm your smoke detector situation: fog machines and heavy candle use can trigger alarms, so plan for battery-operated lights in most spots and keep real flames to a minimum or skip them entirely if children will be present.
Step-by-Step Instructions
Step 1: Choose your theme and map the layout
Decide on one theme — haunted house, spooky forest, ghostly graveyard, or mad scientist lab — and sketch a quick layout of your space on paper. Mark where guests will enter, where they will gather, and where the food and drinks sit. Assign each zone one or two decoration ideas and write them on the sketch. Circle your single highest-impact spot, such as the entryway or the wall behind the food table, because that is where you will place your best props.
Tip: Take phone photos of each zone before you start. You will use them to judge the effect later and to remember where everything goes when you pack up.
Check: You have a sketch with at least three labeled zones and one circled focal point.
Step 2: Set up the lighting first
Turn off the main overhead lights and set up your replacement lighting before hanging anything. Run orange or purple string lights along the ceiling edges and around the focal point. Place battery-operated tea lights in jars, on shelves, and inside carved or fake pumpkins. Position one flashlight or uplight on the floor angled upward at your focal point — upward lighting casts long, unnatural shadows that instantly make a space feel eerie. Plug everything into power strips so you can switch the whole mood on with one button.
Tip: Do this step during daylight so you can test and adjust, then re-test after dark. Lighting looks completely different at night, and your party will likely start in the evening.
Check: With overhead lights off and your display lights on, the room reads as dim but navigable, with dramatic shadows at the focal point and no pitch-black walkways.
Step 3: Drape the backdrop elements
Hang your large background pieces next, while ladders and open floor space are still available. Tape or staple black trash bags opened along their seams across the focal-point wall to create a dark backdrop, or stretch cheesecloth and torn white sheets across corners and door frames to suggest decay and neglect. Hang them slightly sagging and uneven — perfectly straight fabric looks intentional, while drooping fabric reads as haunted.
Tip: Keep all fabric at least three feet from any light bulb or outlet to prevent fire risk, and never drape anything over a lamp that will be switched on.
Check: The focal-point wall is covered, and fabric drapes look irregular and layered rather than flat and tidy.
Step 4: Add the mid-layer decorations
Fill the middle distance of each zone: stretch fake cobwebs across corners, window frames, and the backs of chairs, pulling them thin so they look aged. Position plastic spiders, rats, and insects inside the webs and along baseboards where guests will spot them at eye level or below. Tape construction-paper bats to walls and window glass in loose clusters of five to eight, cutting each bat’s wings at slightly different angles for a natural swarm look. Write spooky messages like ‘ENTER IF YOU DARE’ in washable paint or chalk on windows and mirrors.
Tip: Attach cobwebs starting from a corner anchor point and pull outward with your fingers. Over-stretching them in one direction makes them snap and look stringy instead of webby.
Check: Every zone has visible mid-layer detail, and small creatures are placed low enough for seated guests and children to notice.
Step 5: Build two or three high-impact DIY props
Choose from these three proven props and place them at your focal point. Floating ghosts: drape a white sheet or cheesecloth over an inflated balloon, spray lightly with spray starch or stiffener if you have it, let it dry, then pop and remove the balloon and hang the hollow form from fishing line so it appears to float. Ghost lanterns: draw ghost faces on white balloons with a black marker, drop a glowing LED tea light inside a small jar, and place the balloon over the jar mouth. Bloody handprints: dip your palm in washable red paint and press handprints onto windows, mirrors, or the inside of glass doors, smearing a few downward for a dripping effect.
Tip: Build the ghosts the day before the party if using starch, since drying takes several hours. Test one handprint on a hidden window corner first to confirm the paint washes off your surface.
Check: Each prop is visible from the room’s main entrance and holds together when lightly touched or moved.
Step 6: Set the party table as a decorated zone
Dress the food and drink table in your theme: cover it with a black cloth, scatter cobwebs and plastic spiders around the serving dishes (not on the food), and place LED-lit jars or lanterns as a centerpiece. Label dishes with spooky name cards like ‘Monster Mashed Potatoes’ or ‘Witch’s Brew’. Freeze water with a few drops of food coloring and plastic spiders inside a glove, then float the severed ‘ice hand’ in the punch bowl right before guests arrive.
Tip: Keep all decorations at least a hand’s width away from food and drink surfaces, and never put non-food items inside anything edible.
Check: The table photographs well as a unit and no decorative item touches serving food.
Step 7: Add sound and motion effects
Set up a phone or speaker hidden behind furniture playing a loop of ambient spooky sounds — creaking doors, wind, distant thunder, or owl calls — at a volume guests notice but can still talk over. Hang one or two lightweight moving elements, such as paper bats suspended from the ceiling on thread so they turn in air currents, or a ghost placed near a doorway where it sways when people pass.
Tip: Avoid jump-scare sound effects unless your guests are all adults who expect them; sudden loud sounds can frighten children and some adults badly.
Check: Standing in the center of the room, you can hear the ambient track faintly and see at least one decoration move.
Step 8: Do the safety walkthrough and final check
Walk the entire space the way a guest would: from the entrance, through each zone, to the food table and bathroom. Check that no cords cross walkways, no decorations hang at head height where they could catch someone’s face, all candles are LED versions, fabric is clear of lights and outlets, and exits are completely unobstructed. Fix anything you find, then take a final photo of each zone.
Tip: Do this walkthrough in the dark with your party lighting on — hazards hide in dim rooms that are obvious in daylight.
Check: You can walk the full guest path in party lighting without stepping on, ducking under, or brushing against anything, and your photos match the sketch you made in step one.
Common Mistakes to Avoid
- Spreading decorations evenly across every surface — Concentrate your best props at one or two focal points and leave other areas sparse. Empty space makes the decorated areas hit harder.
- Using real candles near fabric and paper decorations — Use battery-operated tea lights for all lighting inside or near decorations, and reserve any real flame for a fully open, supervised spot away from anything flammable.
- Hanging decorations with adhesives that damage walls — Use painter’s tape and removable hooks on painted walls, test tape on a hidden spot first, and only use a staple gun on surfaces you own and can repair, such as a porch beam or corkboard.
- Blocking walkways with cords and low-hanging props — Run extension cords along walls and tape them down, and keep everything hanging above head height or below knee height in traffic paths.
Troubleshooting
Problem: The room looks decorated but not spooky
Solution: The issue is almost always lighting. Kill the overhead lights entirely, rely on orange and purple accents plus one upward-facing light, and add more shadow. Remove a few decorations so the space feels abandoned rather than busy.
Problem: Fake cobwebs clump into strings instead of spreading
Solution: Pull from a small anchor point slowly in multiple directions rather than stretching one handful across a wide gap. Use less web per area and stretch more anchor points from it.
Problem: String lights or effects trip the circuit breaker
Solution: Split your lights across two different circuits — typically different rooms or wall zones — and use LED lights, which draw far less power than incandescent. Unplug any non-essential items.
Problem: Washable paint handprints will not come off a window
Solution: Re-wet the paint with warm soapy water and let it soak for two minutes before wiping. Avoid scrubbing dry. If paint resists, use a razor scraper designed for glass at a low angle, keeping the surface wet.
What Success Looks Like
Your decorations are complete when you can walk in from the entrance in party lighting and immediately feel the atmosphere: dim colored light, visible focal-point props like floating ghosts or a draped backdrop, layered detail at eye level and below, faint ambient sound, and a decorated food table. Nothing blocks a walkway, no real flame sits near fabric, exits are clear, and guests of all ages can move through every zone safely. Photos of each zone should show a coordinated color palette and a clear focal point, not scattered clutter.
Next Steps
After the party, photograph everything before teardown so you can rebuild the layout faster next year. Dispose of trash-bag backdrops and used cobwebs, wash paint from windows before it sets for days, and store reusable props — ghosts, bats, string lights, and plastic creatures — in labeled bins by zone. If you want to grow the display, add one new element each year, such as a fog machine (use only in ventilated areas away from smoke detectors) or a projected window effect. For larger outdoor displays, check local guidelines on open flames, extension cord safety, and obstruction of public walkways before expanding.
Frequently Asked Questions
How far in advance should I decorate for a Halloween party?
Decorate one to two days before the party. This gives you time to test lighting after dark and fix problems without a deadline pressing. Build starch-stiffened ghosts two days ahead because drying takes several hours.
How can I make decorations spooky on a very small budget?
Focus on lighting and free materials. Black trash bags make backdrops, white sheets become ghosts, and hand-drawn bats cut from construction paper cost almost nothing. A single flashlight angled upward creates more atmosphere than twenty purchased props.
How do I make the decorations safe for young children?
Use only LED lights, keep small plastic insects and spiders out of reach of toddlers, avoid jump-scare sound effects, and place all decorations above grabbing height or fully out of play areas. Skip anything that could be pulled down onto a child.
Can I use a fog machine indoors?
Only in a well-ventilated room with a window cracked open, placed away from smoke detectors, and never in a closed small room. Test it before the party; if it sets off an alarm, switch to a humidifier-based mist or skip fog entirely.
What is the fastest way to take everything down without damage?
Remove tape and hooks slowly at a low angle, pulling parallel to the wall rather than straight out. Re-wet any stubborn adhesive with warm soapy water before pulling. Wipe washable paint off glass the same night while it is still fresh.
Evergreen bestsellers Picks
bestsellers
As an affiliate, we earn on qualifying purchases.